[tl;dr — if you’re reading this and just want the fix, click here. However, I’d recommend reading the short preamble — the reasons why Windows presents this error are interesting.]
The Backstory
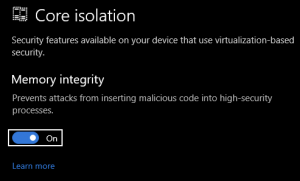
You’ve seen it, if you’re reading this — the new option in your Windows Settings to enable “Core Isolation”:

Basically, it separates the way windows processes run on your system so that they’re running in fully virtualized environments, utterly isolated from each other — neat, huh? This may be wrong, but I kind of think of it like a “containerization” for your normal windows processes.
Well, if you’re like me, when you tried to turn this on, your computer reported that it could not turn this on due to “driver incompatibilities”.

At this point… you may be stuck. Like I was, for weeks. This is a tough problem to get past. The error message that Windows presents at this point is not helpful, and the link to microsoft.com tells you little more than what the error message is already telling you… it’s frustrating.
You may be thinking to yourself, “Okay… so I’ve got drivers that are incompatible with this new feature. Um, turn them off? Don’t use them?”
I’m guessing Windows does not offer anymore help here because mucking around with drivers on Windows can lead to some major problems (for example, while trying to enable this feature, I rendered my entire Windows partition unbootable. Plus, booting into safe mode to try to fix it was impossible, because I have bitlocker turned on, and I lost my recovery key! Fun!).
So, at this point, Windows just leaves you high and dry. You may try to search the Internet for answers, but: be careful. There are several sites out there that offer “solutions” for this by offering a way you can download a registry key and force-enable this option (I won’t link to them here so their visibility in search engines won’t improve). Trust me; just don’t do this. Just don’t. This will possibly render your system unbootable, and depending on your situation, there is no way to revert it, short of a complete re-imaging/reinstallation. (I spent all day doing this one time because of this!)
Anyway — here’s what did work for me.
The Fix
- First things first — keep the Settings window showing the list of “incompatible” drivers open — you’ll need that in a moment.
- Second — download a copy of Microsoft’s SysInternals. If you’re not already using these for Windows system management, you just found one of your new favorite groups of utilities. Released by Microsoft, this is a suite of tools that are so essential, you’ll wonder why they’re not included in default Windows installations (I wonder about this every time I use them).

- In these tools, look for a tool called “Autoruns64.exe” — run it. (It goes without saying that everything here you need to do with Administrator privileges.)
- You’ll be presented with a list of processes, drivers, etc, that run on Windows boot. Click on the tab for “Drivers”.
- Now, for each item in the list of “incompatible drivers” that Windows presented you, type part of its name into the “Filter” field, and de-select its checkbox (if you don’t find it in your list in Autoruns64.exe — skip it and we’ll apply a different fix in a moment):

- Now, open a Powershell window, in Administrator mode. For each driver that you de-selected in Autoruns64.exe, just do “Remove-Item <path to driver>”.
- Restart, and try to enable core isolation again!
Fix for Drivers that Don’t Show Up in Autoruns64.exe
Okay — you’ve done the steps up above, and for some strange reason, you have an incompatible driver that’s not showing up in Autoruns64.exe (its “Published Name” probably starts with “oem”, doesn’t it?). The exact reason for this is something that still eludes me, but basically, it’s a very naughty driver that’s going to need a special trick to remove it.
For this, we’ll be using a tool called “pnputil” in Windows, which is just another one those utilities that’s included with Windows that you’ve never encountered before today (if you have, my condolences!).
For this type of driver (with a published name that, like I said, probably looks like “oem30.inf”), do the following command in a Powershell window running in Administrator mode:
pnputil -f -d oem30.inf

(for example; change "oem30.inf" to whatever is the "published name" of the driver you're having trouble with)
In Conclusion
That should be it, and Core Isolation should work now. If it doesn’t, then you’ve encountered a weird issue that isn’t covered here — but don’t fret too much! If you’re kind of person to try to troubleshoot this issue this far, your Windows installation is already very secure, even without this feature.
Keep trying, and then, when you figure out your solution, make sure and write about it so it can help others!