Categories
Internet Linux Programming Science and Technology Ubuntu

mysql_connect() breaking with an upgrade to PHP7?

mysql_connect() has been finally removed from PHP7 (it was deprecated for some time), and now you have to use mysqli_connect();   The same goes for any other mysql_ commmand.  (I simply did a find/replace for “mysql_” and changed it to “mysqli_” in my php code.

Also, if you’re running your own server, you probably need to install the “php-mysql” after upgrading to PHP7 — it doesn’t seem to be installed along by default anymore.

Categories
Android Enterprise Computing Hardware Science and Technology

Unified Internal Storage for Android 6.0+

Thinking about using Unified Internal Storage on Android 6.0+ to expand your phone’s measly internal storage?  Don’t even think about using it with anything other than a UHS-II SD card — even if your phone will let you use a slower card, don’t do it — your performance will be terrible.

It seems like it has to be UHS-II, for some reason (maybe it’s random r/w speeds?). I tried with even a very, very fast UHS-I, that benchmarked nearly the same, but Android wasn’t satisfied with it, giving the “This SD card is slow” warning.

The best priced one I could find out there (that you’d want to use) was a 32GB one:

https://www.bhphotovideo.com/c/product/1211505-REG

Categories
Automotive Gaming Reviews Science and Technology

Review: Gran Turismo 5

(Editor’s Note: I originally started this draft about a year after Gran Turismo 5 came out.  Most of it still applies; some of the gripes were corrected in Gran Turismo’s most excellent next release, Gran Turismo 6.)

What can I say about Gran Turismo 5, a game that was in development for five years; a game that charged $39.99 for its demo download three years ago?

Seriously.

GT5 EU Box ArtIs it cool?  Yes, it’s cool.  But then again, I grew up playing Gran Turismo — I probably racked up 100’s and 100’s of hours on Gran Turismo and Gran Turismo II alone (Gran Turismo III and IV, I never played much, and I regret that — III was apparently one of the best games ever released on the PS2 during the 2000’s).  GT5 could be nothing more than a port of Gran Turismo IV for the PS3, and I’d still love it.  I’m probably not the best person to judge whether or not GT5 is cool.

Does it look good?  Yes, it looks great.

Does it have lots of badass cars?  Check.

By this point, with all the hype that’s been built-up about this game over the years; all the stories of just how maniacal the creator, Kazunori Yamauchi, was in making sure that GT5 was going to absolutely perfect; all the stories of how imaging each car for GT5 was taking 10 times as long as it took to image a car for GT4 (which itself took 10 times as long to image for as it did GT2)…

With all this hype, how could GT5 possibly make anyone happy?

The Bad

The loading times are horrendous. (Try about a minute of waiting, every time you start a race.)

The selection of cars is limited, and the “full resolution” cars, new for GT5, is maybe 10-15% of the total cars.  The rest are all ports of the GT4 cars, and the much poorer graphic quality of the cars can show.

The Good

All right, but it’s not all bad.  Most of the graphics look amazing on the PS3.  And finally, finally, FINALLY, there’s a multiplayer network option!

Yes, the dreams you had when you were younger of playing Gran Turismo verses races from all around the world is true, and it’s great.

Not only that, but you can play with your close friends and family on the Playstation Network, and can gift cars to them (great for giving your fiends a leg-up when they first start playing).

Final Word

Is it worth it?

If you want to play Gran Turismo on the PS3, it’s the only way to do it (unless you’re going to pop in an old copy of Gran Turismo 1 from the PS days).

Was it worth the wait, though?

No — no game should take five years to come out, past the point of the first demo.  No game should ever charge for a demo (and nearly a full price charge, too).

Ugh.  Just ugh.

Categories
Hacking Linux Programming Science and Technology Ubuntu

Using Dreamhost’s VPS as a MySQL Server

[Editor’s Note: Dreamhost no longer allows sudo access on their VPS servers, so the below is no longer possible. If you’re reading this, you might want to check out Amazon’s AWS. Nowhere near as user friendly as Dreamhost, but MUCH more powerful.]

I’ve been a happy customer of DreamHost for many years now — for $9.95 a month, I was able to get loads of diskspace and unlimited bandwidth, all from a great company that was staffed by great people who were very technically competent.

It is “shared hosting,” however — that means you’re getting it that cheap because you’re sharing server CPU power, available RAM, etc, with many other people who are also getting a great deal. You’ll notice this in any WordPress sites you may run on Dreamhost’s shared hosting — there’s about a 7-10 second delay between when you navigate to your site and when your page actually loads, mostly because your server processes are waiting in line behind everyone else’s.

So, Dreamhost does offer a “VPS” service — with this, you’re getting an absolute amount of RAM, CPU power, etc, that will only be used for your sites. It’s a tiny bit more expensive, at $14.95 or so a month, but it’s worth every penny.

If you’ve run WordPress installations on a Dreamhost site, though, you know that your mysql databases are on a seperate server entirely, and that may slow things down as well. Even if you move your WordPress installs to a VPS, your mysql databases will still be on shared hosting. DreamHost offers a “MySQL VPS,” but it costs another $15 a month (minimum), and you have no control over it at all.

A better solution would be to run your own MySQL server on DreamHost’s main VPS, since they give you root command-line access. There are a few hiccups in this process (some put there by DreamHost itself), but otherwise you should be able to do it.

  1. First, create an admin user for your VPS that has sudo abilities, and log into your VPS with that through ssh.
  2. Second, you have to tweak apt so you can even install the mysql-server package. It appears as if part of installing packages through apt involves temporarily storing files in /tmp and then running them from there.Unfortunately, the /tmp directory is mounted on DreamHost’s VPS servers with the noexec option, which means that you can’t run files that are present in that directory. That basically prevents you from installing the mysql-server package until you tweak apt to temporarily stage files in /var/tmp instead. Do this by:Creating a file called apt.conf in the /etc/apt/ directory, and edit it so the contents are the following:
    APT::ExtractTemplates::TempDir "/var/tmp";
  3. Then, install the mysql-server package:
    sudo apt-get install mysql-server;
    

    (When it asks to set a root password, make sure and set one.)

  4. Now, edit the file /etc/mysql/my.cnf and set the following options:
    bind-address=psXXXXX.dreamhostps.com

    (Replace psXXXXX with the name of your dreamhost VPS.)

  5. Restart your mysql service:
    sudo service mysql restart

At this point, you should be able to log in to your new mysql server:

mysql -u root -p

and then perform what SQL functions you need to.

A great thing to do is to install phpmyadmin using the tutorial here: http://wiki.phpmyadmin.net/pma/Quick_Install

First you’ll want to create a user (that isn’t your root user) to log into phpmyadmin:

mysql> CREATE USER ‘newusr’@’%’ IDENTIFIED BY ‘your_password';
mysql> GRANT ALL PRIVILEGES ON *.* TO ‘newusr’@’%’ WITH GRANT OPTION;

At this point, you can sync your old databases to your new mysql server using the built-in sync tool that’s in DreamHost’s installations of phpmyadmin.  Then, just edit the wp-config.php file in the folder of your WordPress installations, and change the line that says the following to your DreamHost VPS:

define('DB_HOST', 'psXXXXXX.dreamhostps.com');

Sources:

Installing mysqld on Dreamhost VPS

https://bugs.launchpad.net/ubuntu/+source/debconf/+bug/90085

http://serverfault.com/questions/72356/how-useful-is-mounting-tmp-noexec


Categories
bookmark

Creating a Launcher Icon for the Unity Launcher on ubuntu

http://ift.tt/YCumdP

Categories
bookmark

How to Rip a DVD to Your Computer

http://ift.tt/wDfEzO

How to actually rip DVD’s with Handbrake, by using the extra DLL’s provided by VLC.

Categories
Android Hacking Hardware

Creating a QI Wireless-charging Case for the Moto X (or any phone, really)

The Moto X (2013) is one of the best Android phones there is — it’s thin, it’s light, and the battery lasts nearly two days.  It’s got passive, voice-activated features that you can use even when the phone is locked and in your pocket.  You can launch your camera just by flicking your wrist in a certain way.  It’s got a lot of great features… but (eventhough there’s actually space inside the phone for it) QI-compatible wireless-charging was left off that list.

There are mods out there to take apart the Moto X and install a QI charging bad, but it renders you unable to charge your phone via a conventional cable when necessary, so I didn’t want to take that route.  Even if I have access to wireless charging pads at home, there’s going to be a situation where I’m going to need to charge my phone away from home, and modifying your phone in that way would prevent that (without disassembly).

When looking for wireless-charging compatible cases for my MotoX, the pickings were slim — I found one that was compatible with Duracell’s (proprietary, and not very well supported) Powermat technology, however, I’m wanting to take advantage of the huge mount of QI-compatible wireless-charging devices already out there.  QI is a technology that’s already been used by Nokia and Google for years now, and it’s licensed much more easily than Duracell’s technology.

So, I set about making my own QI-compatible wireless-charging case, using parts you can buy easily on Amazon.

#1) Buy your parts

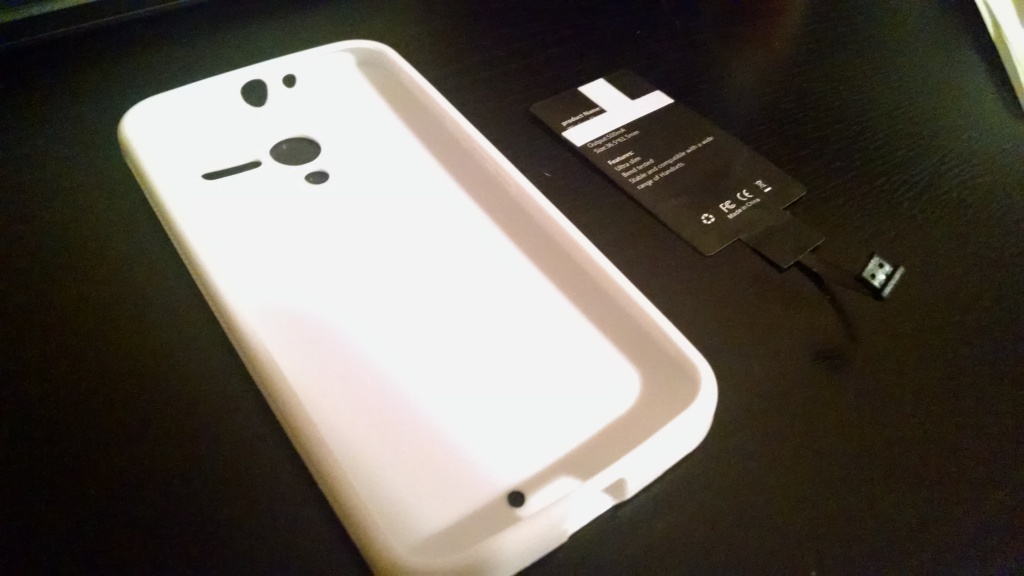
Moto X and QI wireless charging pad, side by sideImportant: Get a QI-compatible charging receiver with the USB plug that faces up.  The case doesn’t matter, as long as it’s one that leaves enough room between the phone and the case so that there’s room for the charging pad.

#2) Test fit your charging pad in the case

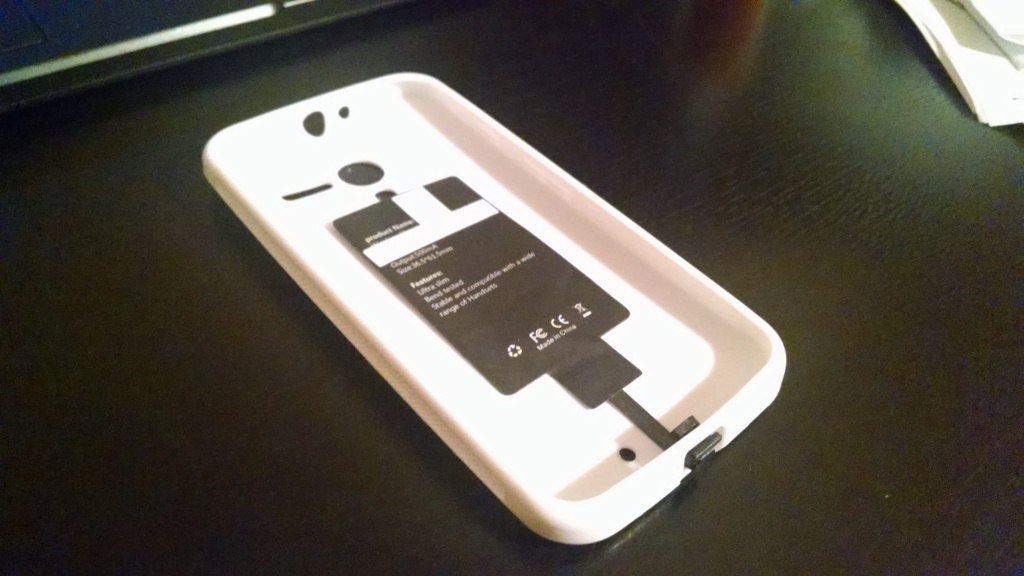
Charing pad just sitting in case.

Try placing the charging pad in the case, and plugging the connector into your phone (at the bottom).  The case will “pinch” the connector cable a little — this is okay.  It’s durable, and very thin.

When you’ve figured out where the pad will sit when sandwiched between your phone and the case when it’s plugged in, move to step #3.

#3) Glue your case (or attach with tape)

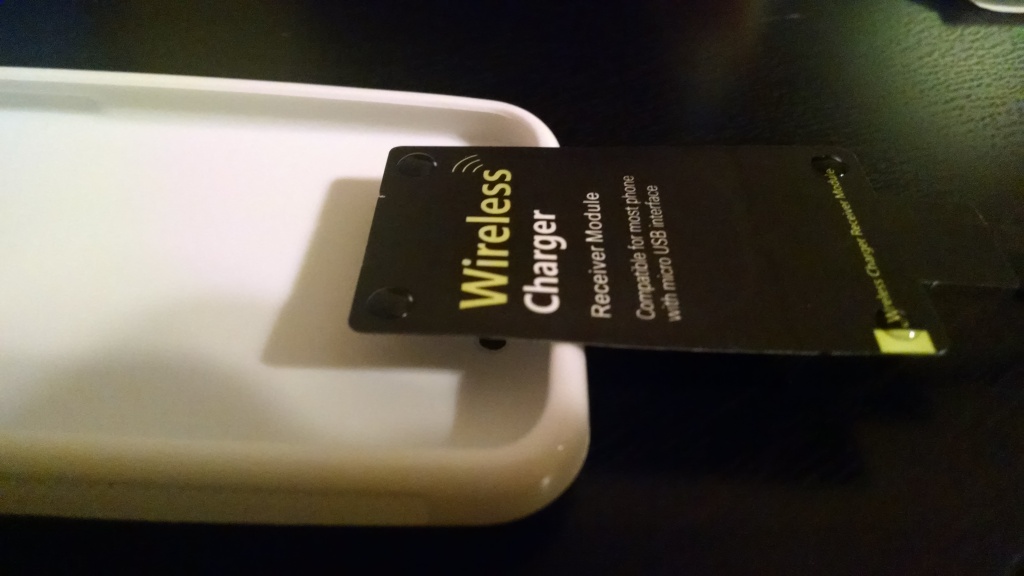
Glue on four corners of charging pad

When you’re ready, put four drops of glue and place the pad into its final resting position that you decided upon in Step #2 (or just place it there and put four pieces of clear tape over the corners — this is what I had to do eventually when the glue wouldn’t hold).

#4) Seat everything together

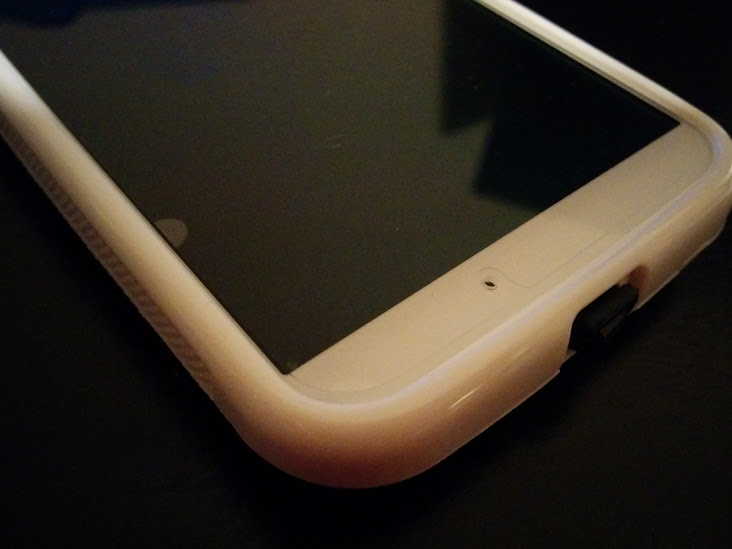
Phone with case on with charging pad installed.

When your glue has dried (or your tape has been placed), carefully insert the QI charging pad cable into your phone’s USB port, and place your phone into the case.  Everything should sit together nicely, which just the little extrusion for the USB plug.

#5) Charge on a QI-compatible charger

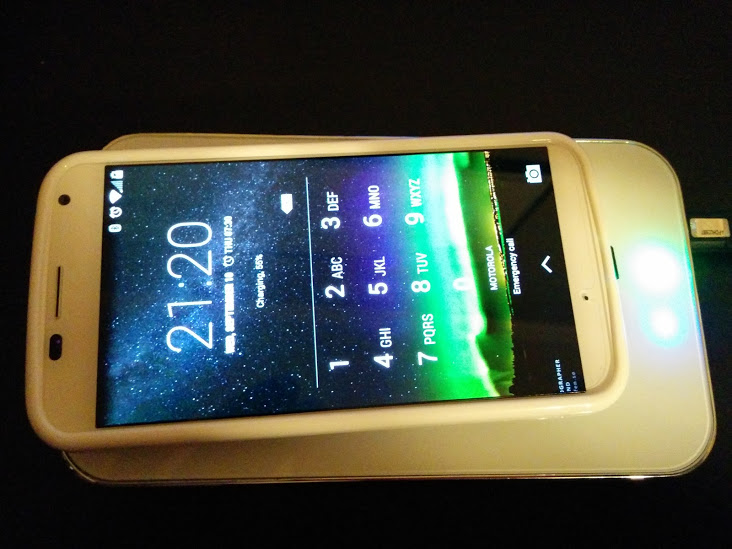
Moto X with QI charging case on wireless charging pad.

When I placed my phone on the Anker charging pad, it started charging right away!  The phone even reflected so on the battery icon — I had heard from similar tutorials that sometimes this was not the case.  The phone would be charging, but the icon on the home screen would not show it.

I think this is due to whatever combination of charging pad and QI insert these individuals were using was not sufficient enough for the phone to reflect it, even though an actual current was being delivered to the phone.  I have experienced this in the past with Android tablets, if you’re using a charger that didn’t come with the tablet — the tablet would charge, even if the tablet’s UI didn’t reflect it.  It would charge very, very slowly.

So, good luck, and happy charging!

Categories
Automotive Science and Technology

EV Market Tepid, Except for All the Cars Being Sold

Seen on an otherwise kinda interesting article from Forbes about how Volt sales didn’t match what GM expected, and how the company is choosing to direct its advertising in another direction for the revamped Volt:

And while overall sales of plug-in hybrids and full EVs remain tepid except for Teslas, and U.S. oil supplies look more secure than ever, the future of propulsion always has a way of surprising us. Note, Bunkley wrote, how most people wrote off the future of large SUVs several years ago — and now sales are going back through the roof.

“Tepid” except for Teslas?  Look, I know the author is kinda going for “Oh, ho hum, EV’s, they’re certainly just a flash in the pan technology soon to go away”, but still…

Chart showing sales of Leaf's nearly triple that of Teslas
[Source: http://cleantechnica.com/2014/08/05/nissan-leaf-still-king-ford-fusion-energi-sales-jump-201/]
And that’s not just for the month of July — that’s the trend for the entire year.

I expect this kinda thing from BusinessInsider.com — I don’t expect it from Forbes.

Categories
Ubuntu

Ubuntu Touch on the Nexus 7 (2013)

I tried Ubuntu for devices — once I figured out what I was doing wrong (you have to flash your device to complete stock and wipe it beforehand), the install went pretty well.

The system is beautiful.  The way to navigate through the UI is beautiful as well.  You swipe from the right to switch between apps.  You swipe up from the bottom very lightly to access the app’s context menu. You swipe from the top to access your notification panel, and you swipe from the left to access a quick launch menu of apps.

However… there aren’t many apps to speak of yet, and the ones that are there are mostly web frames.

Categories
Android Programming

Unlocking/Rooting the HTC One on Linux

I recently bought a used HTC One that I intend on using on Ting — it’s a phone I’ve been wanting to use for about a year. It’s one of the nicest Android phones, with hardware quality approaching that of an iPhone. (Not to mention a software skin much more “professional” looking than a lot of other Android hardware manufacturers out there.)

HTC One Dimensions Picture
Isn’t it beautiful?

I didn’t want to flash or even necessarily root my HTC One, however, the only way to restore some apps (like the Google Authenticator) require rooting, so I had to do it.  What’s strange is that most tutorials and utilities I’ve found are for Windows (like this one from theunlockr) — I guess it shouldn’t be too surprising, considering most PC’s are Windows, but I’d figure that there would at least be some tutorials for Linux, considering Android’s origins.

Well, the good thing is that unlocking/rooting your HTC One on Linux isn’t really that hard at all, if you’re comfortable with the command-line, and familiar with using the android sdk tools (fastboot, etc.).

I’m not going to go into how to set up the Android sdk, etc, since if you’re doing something like manually unlocking your bootloader, you should already be familiar with it!

Unlocking/Rooting Your HTC One (M7) on Linux

Prerequisites:

  • android sdk
  • htcdev.com account
  • Latest recovery .img file from CWM
  • Superuser Hack .zip file: SuperSU (make sure and get whatever is the latest version of the SuperSU flashable zip — earlier versions found in other tutorials no longer work to root the later versions of Sense)

Unlock Bootloader

  • Boot into bootloader and select Fastboot
  • Run command “fastboot oem get_identifier_token”
  • Copy token as explained on the htcdev page, and await your Unlock_code.bin file in email
  • Copy Unlock_code.bin file to your working directory in Linux
  • Run command “fastboot flash unlocktoken Unlock_code.bin”
  • Follow prompts on screen to unlock/reset your phone

Flash Recovery

  • Boot into bootloader and select Fastboot
  • Run command “fastboot flash recovery <recovery.img>” (replace with .img file downloaded from CWM site)
  • Reboot

Root

  • Copy SuperSU .zip file to phone’s internal memory
  • Reboot into recovery
  • Flash SuperSU .zip file
  • Reboot and enjoy
Other Useful Links