The Moto X (2013) is one of the best Android phones there is — it’s thin, it’s light, and the battery lasts nearly two days. It’s got passive, voice-activated features that you can use even when the phone is locked and in your pocket. You can launch your camera just by flicking your wrist in a certain way. It’s got a lot of great features… but (eventhough there’s actually space inside the phone for it) QI-compatible wireless-charging was left off that list.
There are mods out there to take apart the Moto X and install a QI charging bad, but it renders you unable to charge your phone via a conventional cable when necessary, so I didn’t want to take that route. Even if I have access to wireless charging pads at home, there’s going to be a situation where I’m going to need to charge my phone away from home, and modifying your phone in that way would prevent that (without disassembly).
When looking for wireless-charging compatible cases for my MotoX, the pickings were slim — I found one that was compatible with Duracell’s (proprietary, and not very well supported) Powermat technology, however, I’m wanting to take advantage of the huge mount of QI-compatible wireless-charging devices already out there. QI is a technology that’s already been used by Nokia and Google for years now, and it’s licensed much more easily than Duracell’s technology.
So, I set about making my own QI-compatible wireless-charging case, using parts you can buy easily on Amazon.
#1) Buy your parts
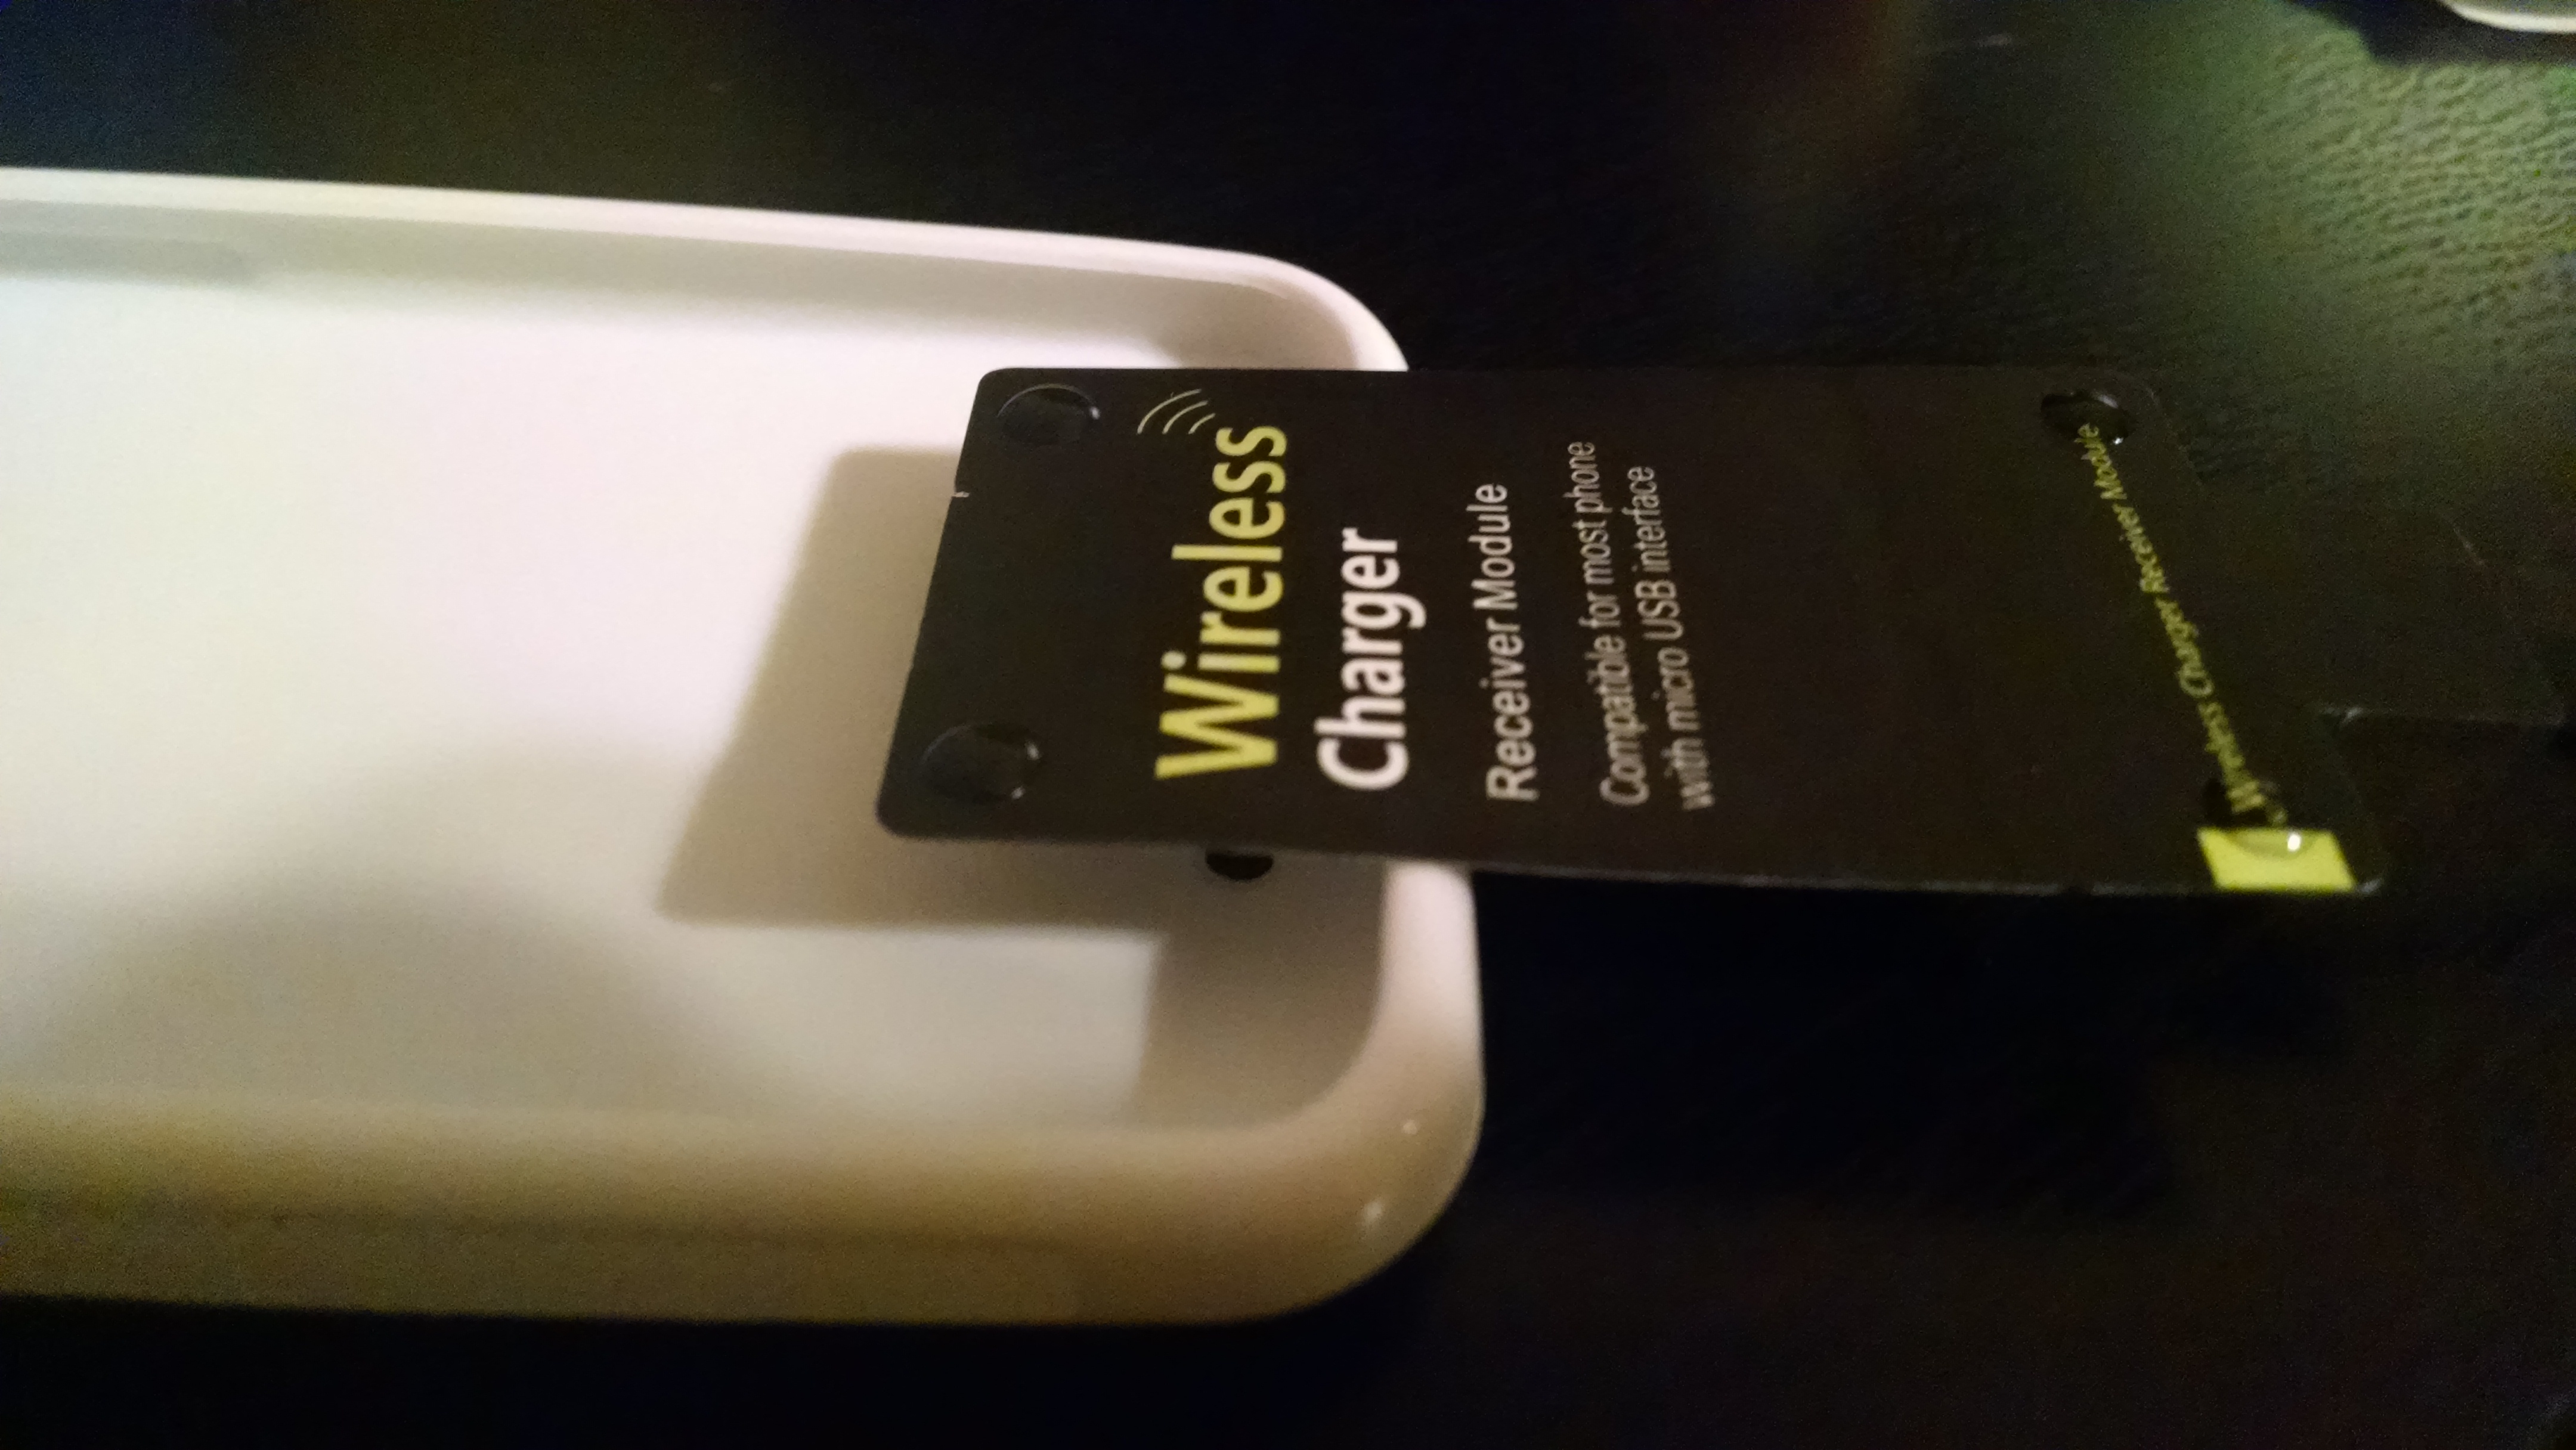
- Intsun® Universal QI Wireless Charging Receiver film
-
Motorola Moto X (1st Generation) Case, Cimo [Grip] Premium Slim TPU Flexible Soft Case
- Anker QI Charging Pad (if you don’t already own one)
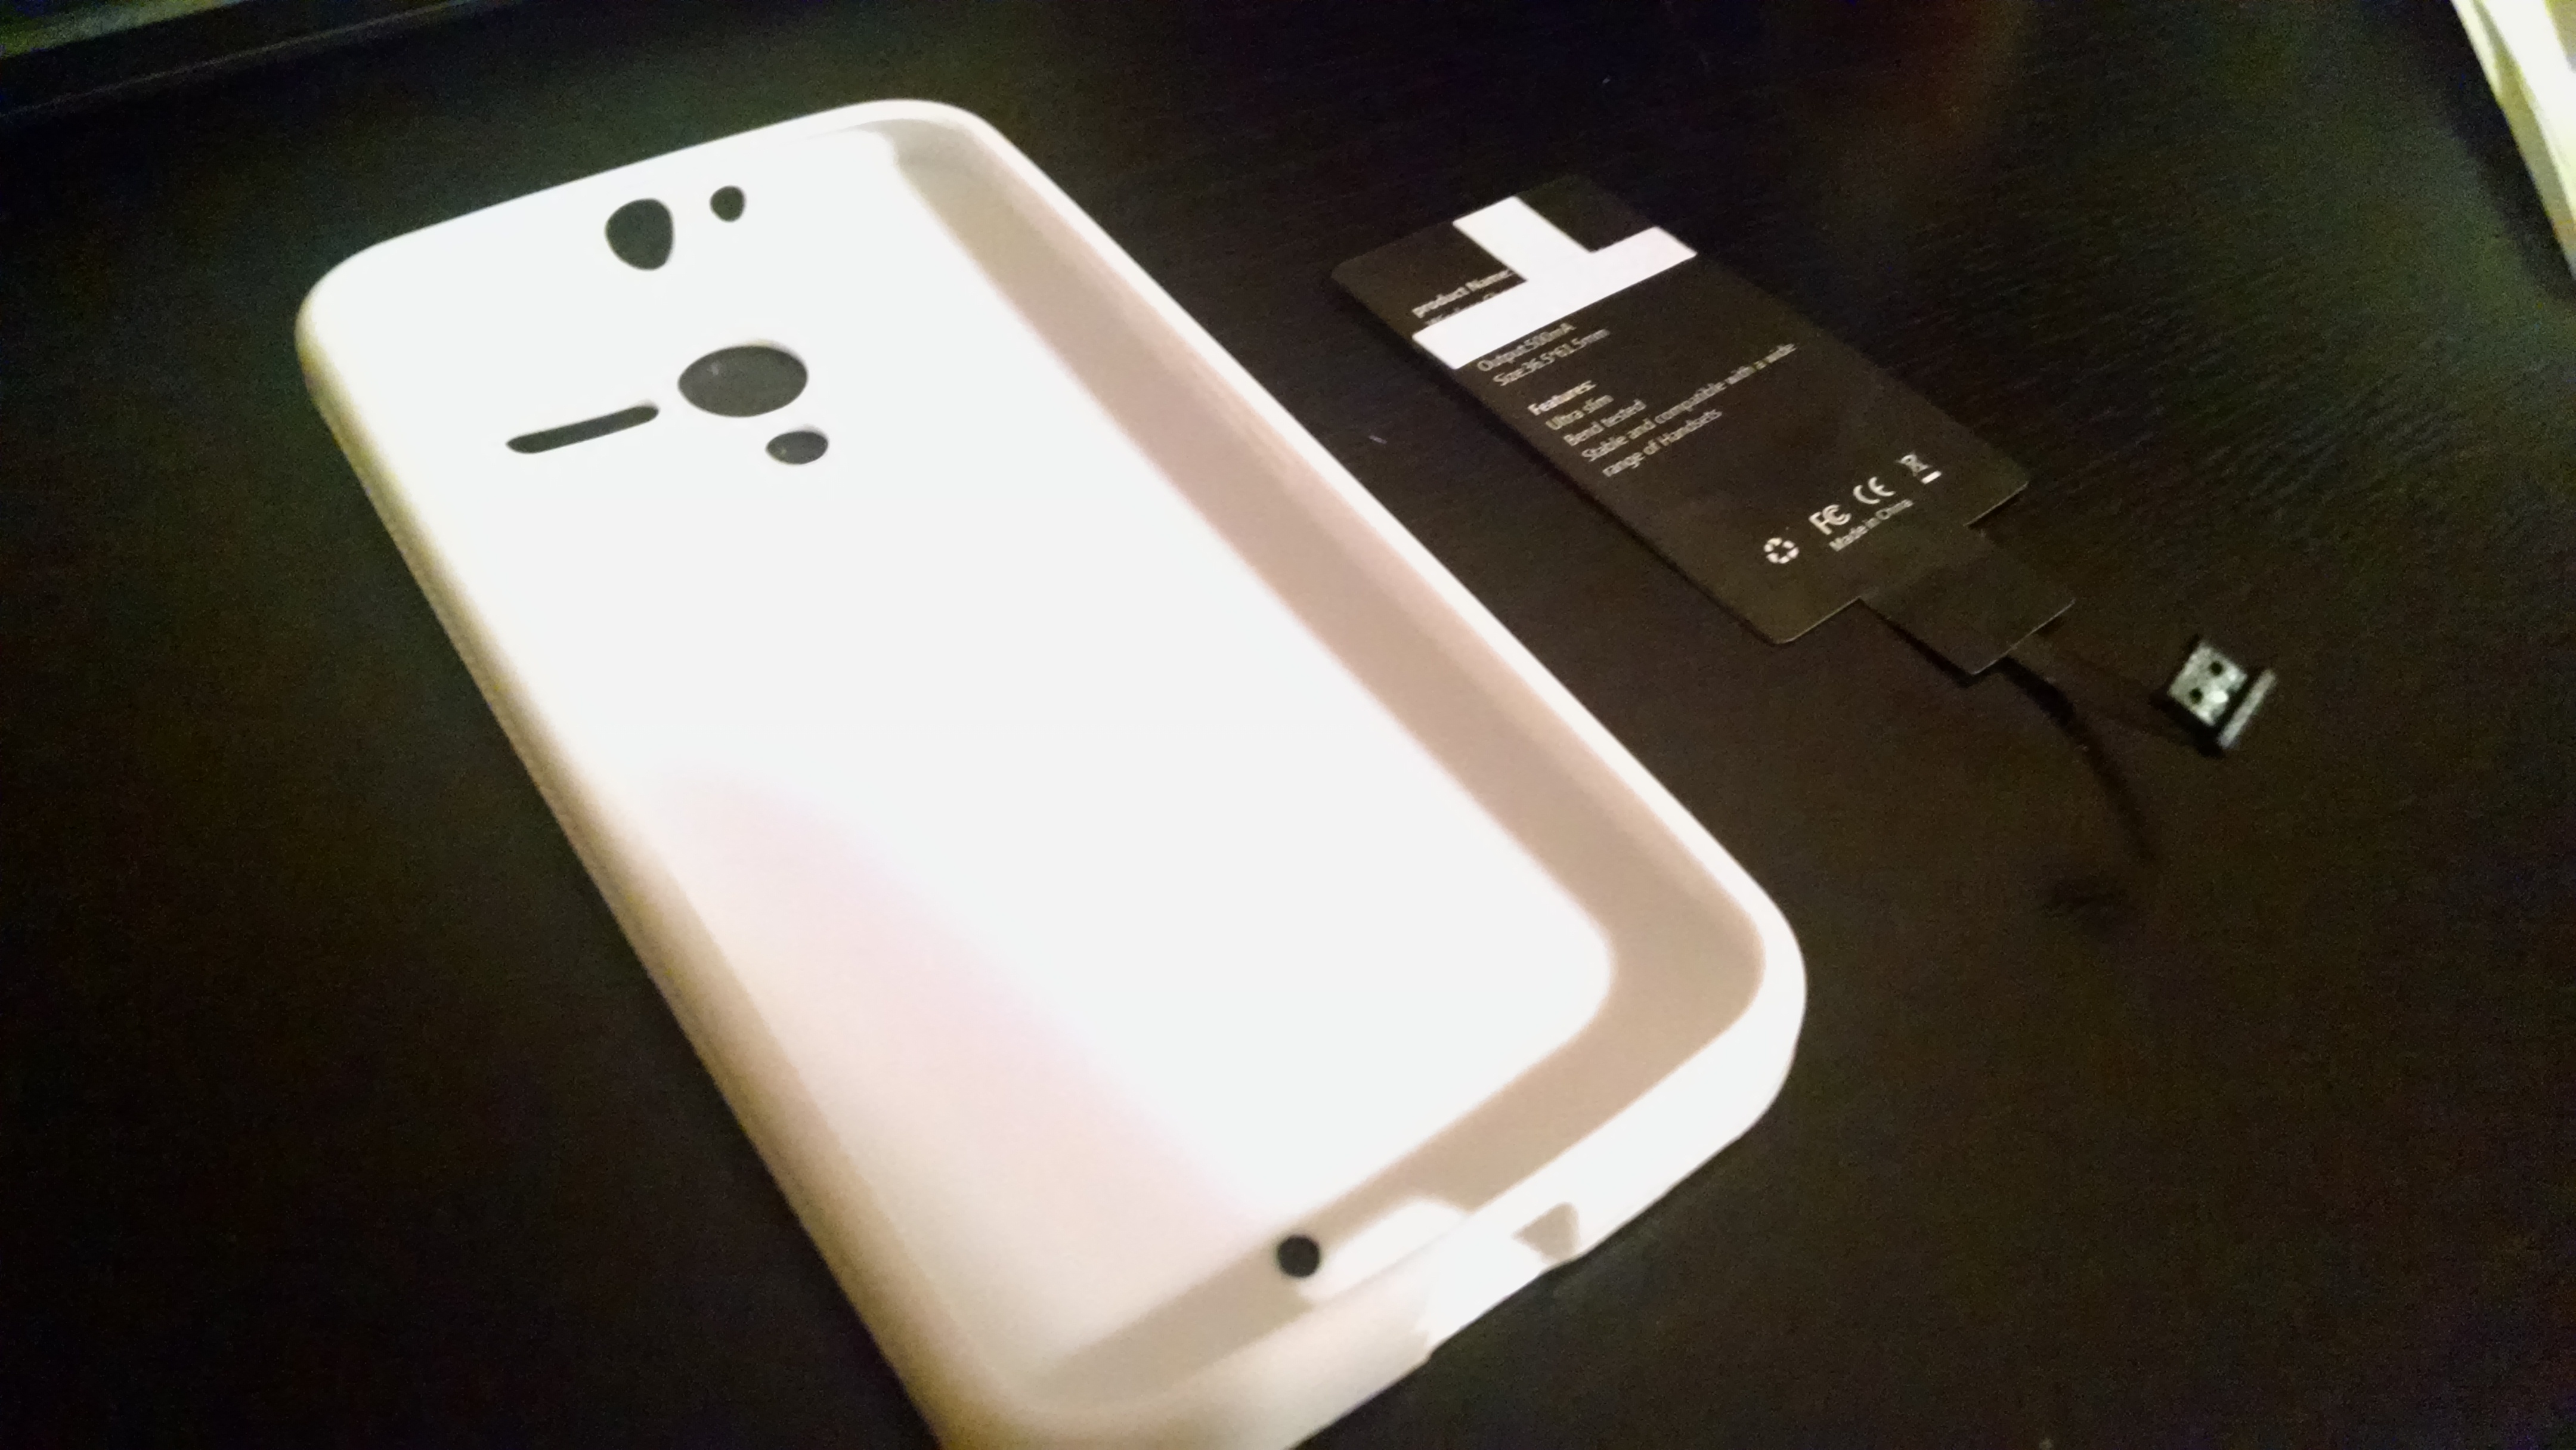 Important: Get a QI-compatible charging receiver with the USB plug that faces up. The case doesn’t matter, as long as it’s one that leaves enough room between the phone and the case so that there’s room for the charging pad.
#2) Test fit your charging pad in the case
Try placing the charging pad in the case, and plugging the connector into your phone (at the bottom). The case will “pinch” the connector cable a little — this is okay. It’s durable, and very thin.
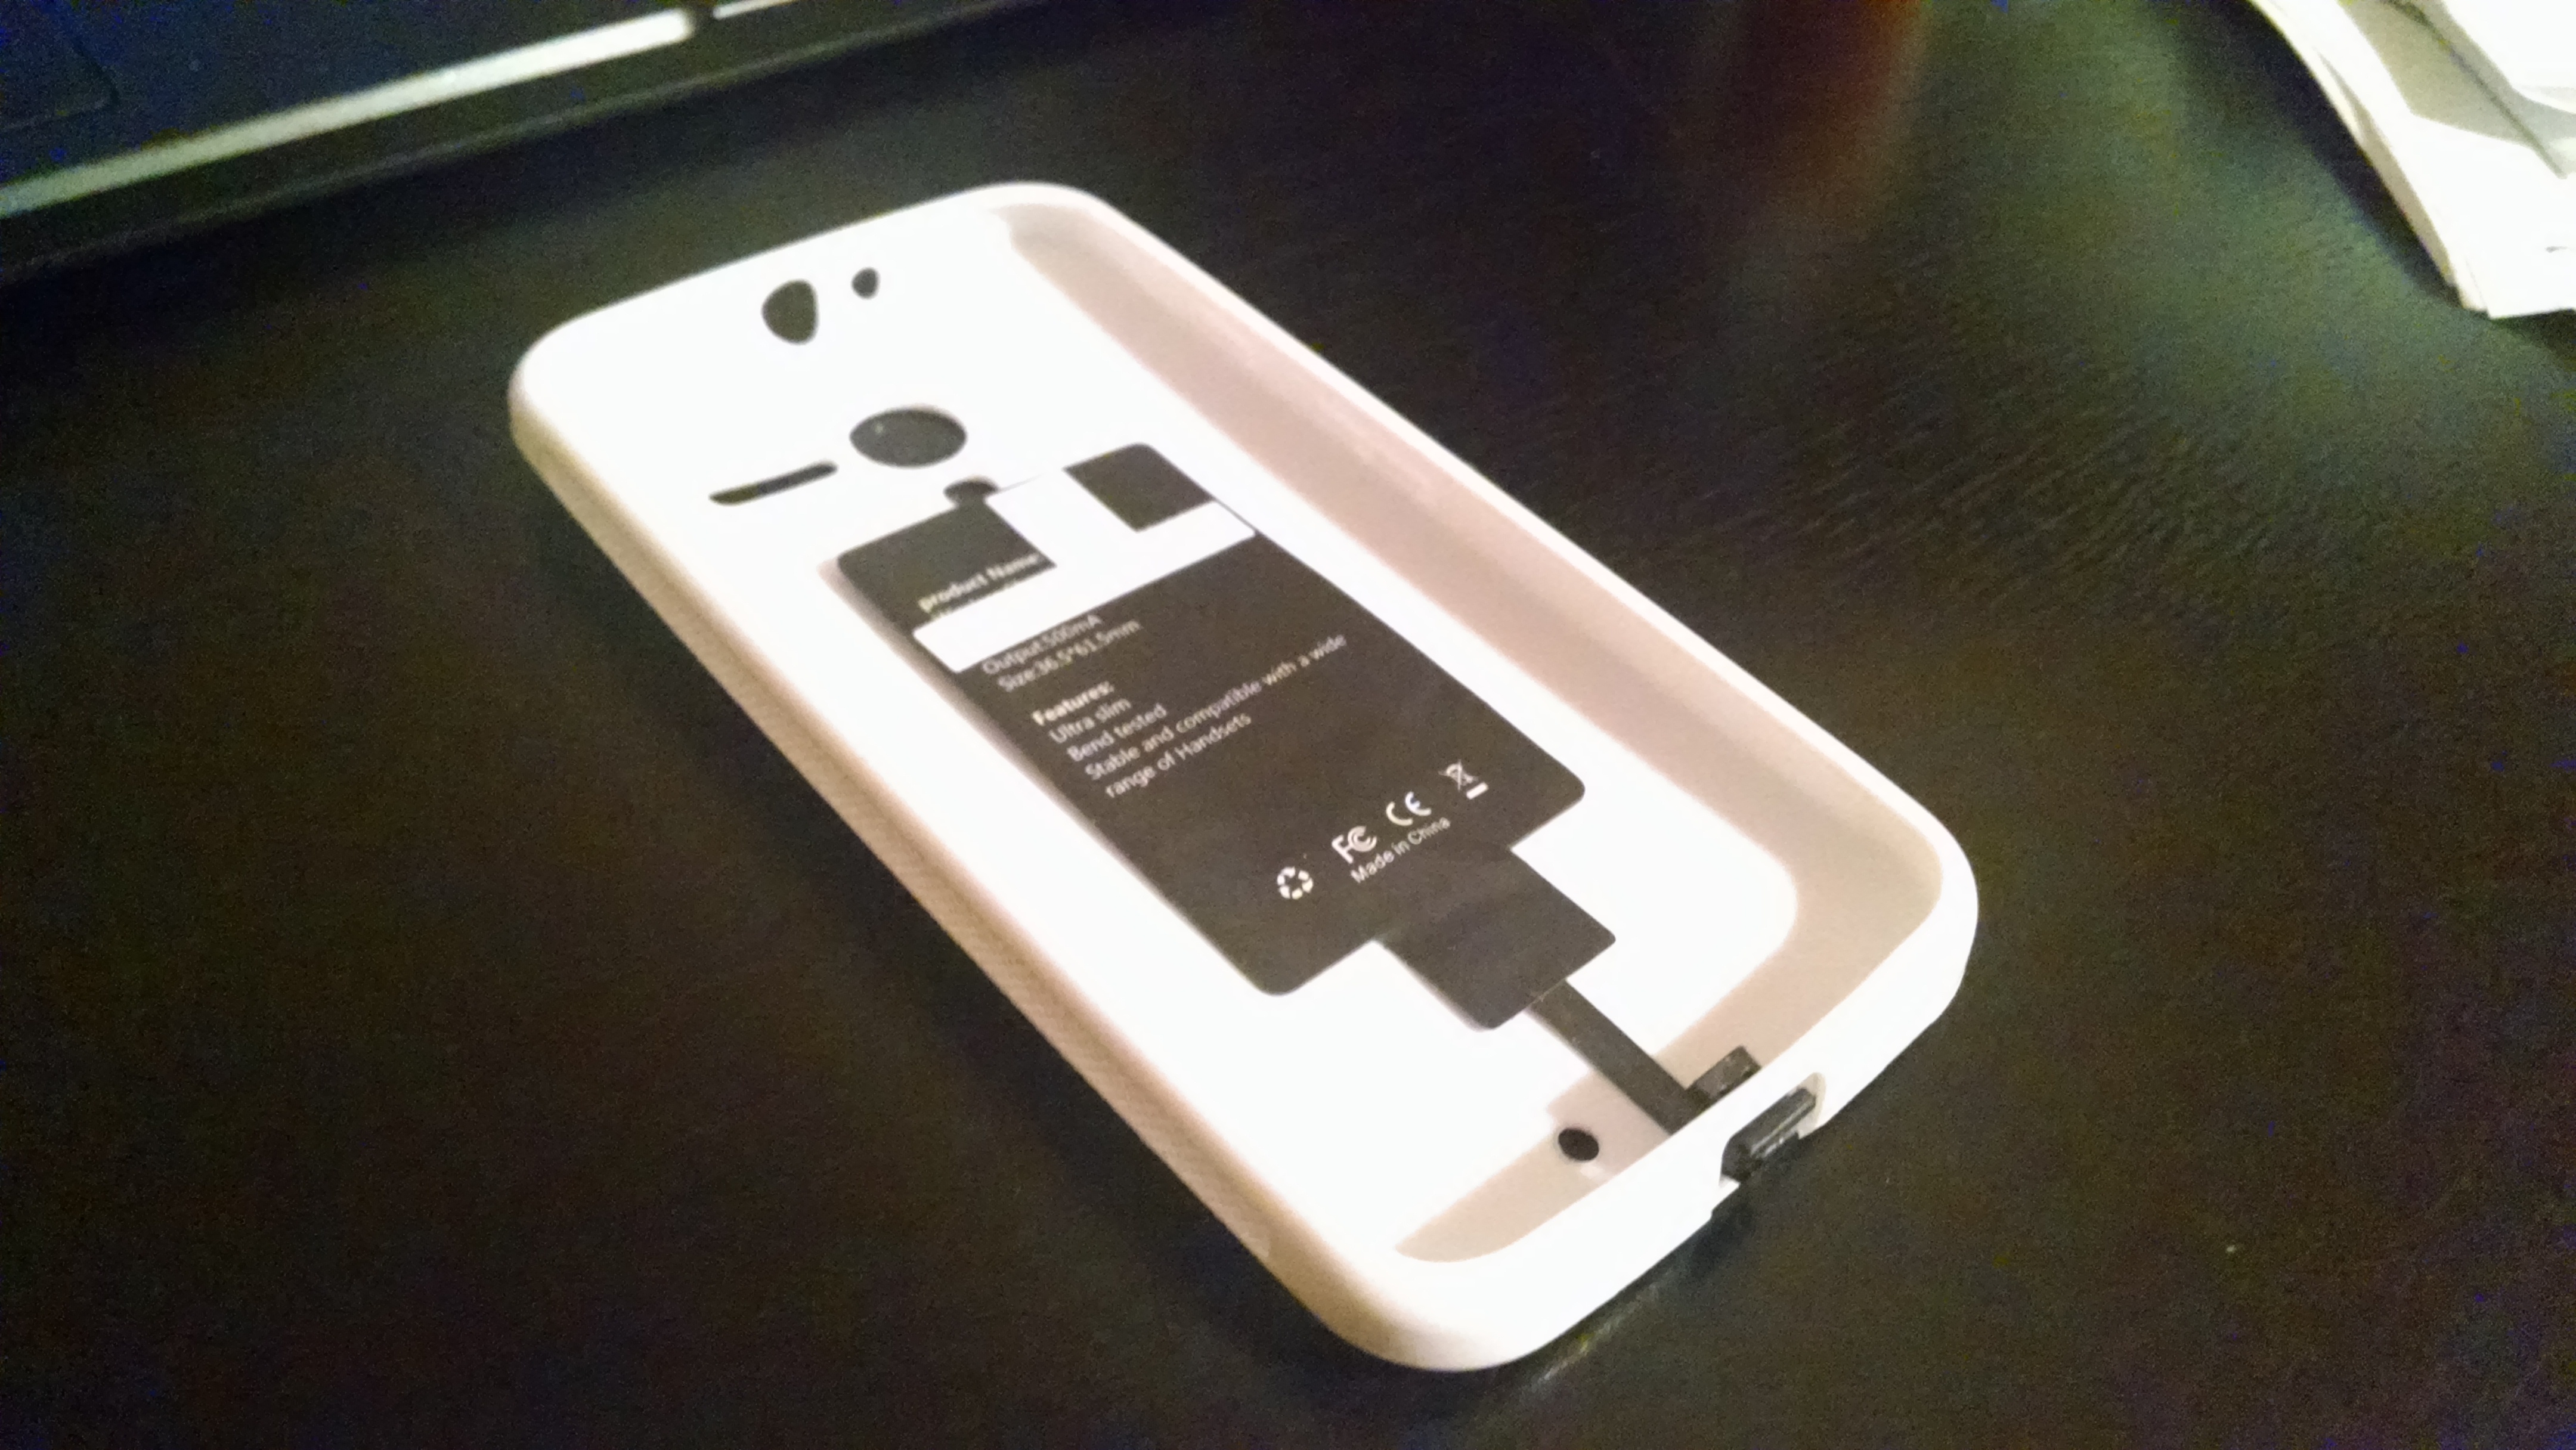
When you’ve figured out where the pad will sit when sandwiched between your phone and the case when it’s plugged in, move to step #3.
#3) Glue your case (or attach with tape)
When you’re ready, put four drops of glue and place the pad into its final resting position that you decided upon in Step #2 (or just place it there and put four pieces of clear tape over the corners — this is what I had to do eventually when the glue wouldn’t hold).
#4) Seat everything together
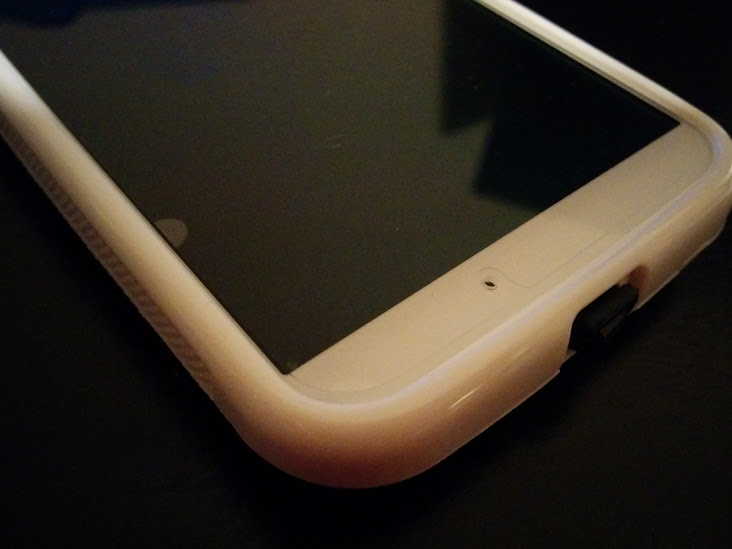
When your glue has dried (or your tape has been placed), carefully insert the QI charging pad cable into your phone’s USB port, and place your phone into the case. Everything should sit together nicely, which just the little extrusion for the USB plug.
#5) Charge on a QI-compatible charger
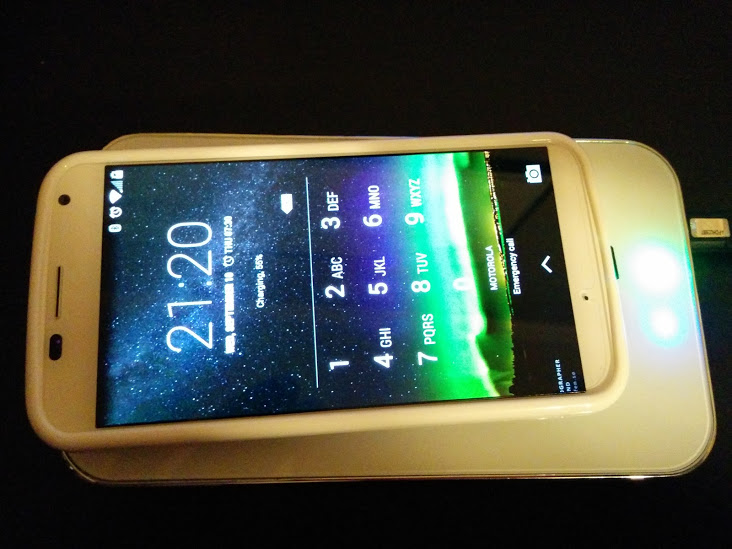
When I placed my phone on the Anker charging pad, it started charging right away! The phone even reflected so on the battery icon — I had heard from similar tutorials that sometimes this was not the case. The phone would be charging, but the icon on the home screen would not show it.
I think this is due to whatever combination of charging pad and QI insert these individuals were using was not sufficient enough for the phone to reflect it, even though an actual current was being delivered to the phone. I have experienced this in the past with Android tablets, if you’re using a charger that didn’t come with the tablet — the tablet would charge, even if the tablet’s UI didn’t reflect it. It would charge very, very slowly.
So, good luck, and happy charging!